Image Overlay
Overlay design mockups directly on your running app to compare against your implementation. Adjust opacity, scale, and position to get pixel-perfect results — no more switching between your design tool and the simulator.
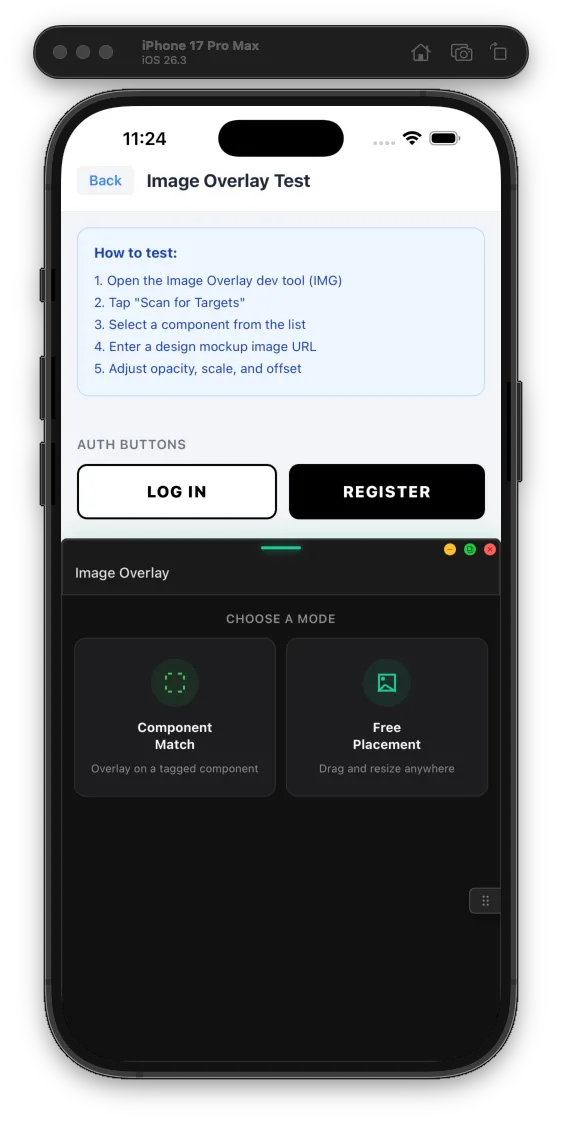
Choose a Mode
Pick Component Match to pin overlays to tagged elements, or Free Placement to position anywhere on screen.
Installation
flutter pub add buoy_image_overlay
flutter pub add buoy_image_overlay
Using the buoy umbrella? It's already registered. Standalone:
import 'package:buoy_image_overlay/buoy_image_overlay.dart';

registerBuoyImageOverlay();
import 'package:buoy_image_overlay/buoy_image_overlay.dart';

registerBuoyImageOverlay();
Marking Components as Targets
To make a widget discoverable in Component Mode, wrap it in BuoyImageTarget:
BuoyImageTarget(
  label: 'LoginCard',
  child: LoginCard(),
);
BuoyImageTarget(
  label: 'LoginCard',
  child: LoginCard(),
);
The label becomes the name shown in the target list. Add as many targets as you like throughout your app — headers, product cards, tab bars.
Two Modes
Component Mode
Tap Component Match to scan your app and see all tagged targets. Select one, and the overlay pins to that widget — measuring its exact position and size, with a dashed highlight. Optional Auto Track re-measures the target as it moves.
Free Mode
Manually position and resize the overlay anywhere on screen. Drag to move, aspect-lock-resize to scale — useful when you want to compare a full-screen mockup or a section that doesn't map to a single widget.
What You Can Do
- Opacity control — Blend the mockup over your live UI to spot differences
- Scale & zoom — Resize the overlay to match your layout
- X/Y offset — Fine-tune positioning for exact alignment
- Flip — Mirror the overlay horizontally or vertically
- Lock — Prevent accidental repositioning while comparing
- Auto-track — Remeasures the target so the overlay stays locked as it moves
What's Next
- Images — Every image load with cache verdicts and oversize audits
- Environment Inspector — Validate env vars with type checking
- Network Monitor — See every API call your app makes